
Articles récents
Domotique : Web server sur un ESP32

Dans cet article, nous allons voir comment installer un mini-serveur web sur un ESP32. Puis, nous rûˋaliserons un montage pour voir comment on peut interfûˋrer via l'ESP32 sur les GPIO.
En effet, un exemple intûˋressant, consiste û allumer une LED par l'intermûˋdiaire d'une interface web. Mais pourquoi est-ce si intûˋressant? Ben, si vous savez piloter une LED, alors vous savez faire autre chose ... de plus sympa en domotique. Comme par exemple, piloter un relais de puissance qui allumerait un matûˋriel ûˋlectrique û distance.
Voyons cela.
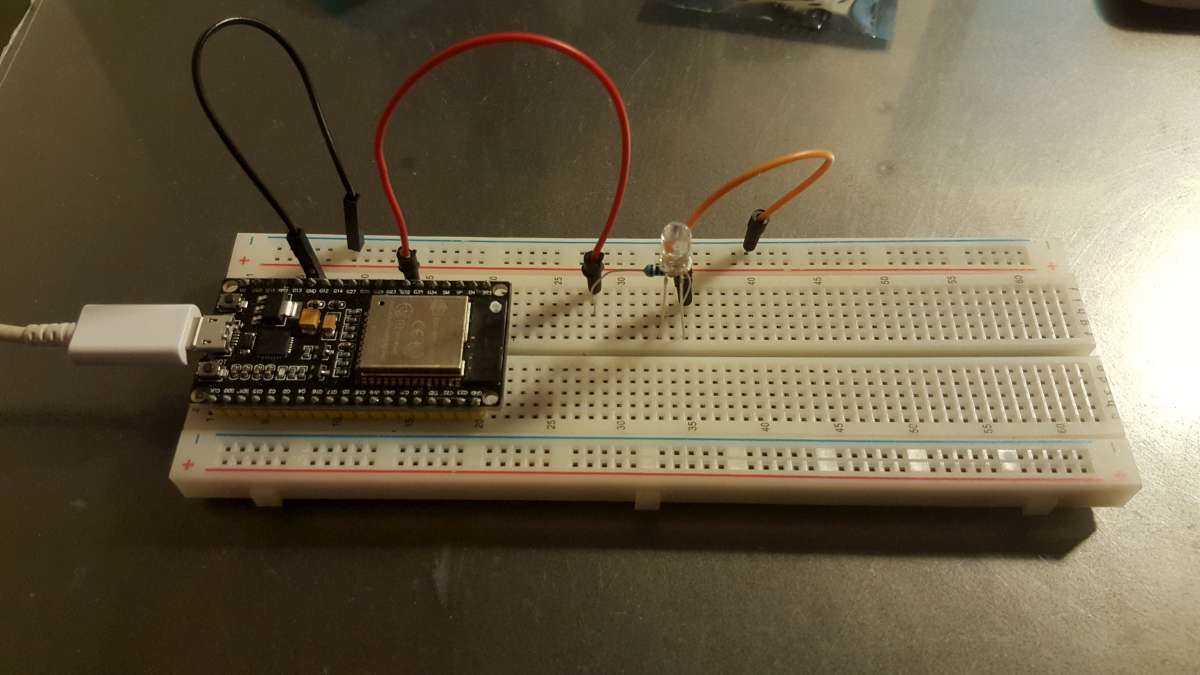
L'objectif est bien d'allumer une led en utilisant l'interface web fournie par l'ESP32 par l'intermûˋdiaire d'un navigateur. La connexion suit le schûˋma suivant:
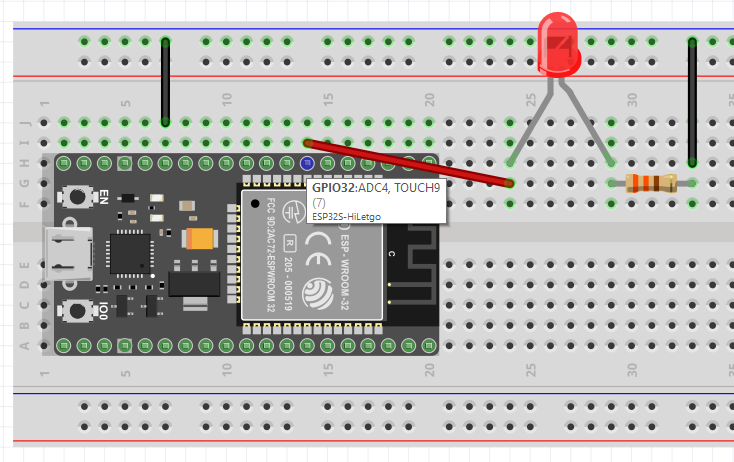
Comme vous pouvez le constater le montage est super simple puisque l'on connecte sur le GPIO 32 sur une LED avec une rûˋsistance de 330Ω pour limiter le courant dans la LED.
Ensuite, il suffit d'intûˋgrer le code suivant dans l'ESP32 via l'IDE Arduino.
#include (WiFi.h) //remplacer () par <>
// Replace with your network credentials
const char* ssid = "votressid";
const char* password = "votrepassword";
WiFiServer server(80);
const int led1 = 32; // the number of the LED pin
const int led2 = 17; // the number of the LED pin
// Client variables
char linebuf[80];
int charcount=0;
void setup() {
// initialize the LEDs pins as an output:
pinMode(led1, OUTPUT);
pinMode(led2, OUTPUT);
//Initialize serial and wait for port to open:
Serial.begin(115200);
while(!Serial) {
; // wait for serial port to connect. Needed for native USB port only
}
// We start by connecting to a WiFi network
Serial.println();
Serial.println();
Serial.print("Connecting to ");
Serial.println(ssid);
WiFi.begin(ssid, password);
// attempt to connect to Wifi network:
while(WiFi.status() != WL_CONNECTED) {
// Connect to WPA/WPA2 network. Change this line if using open or WEP network:
delay(500);
Serial.print(".");
}
Serial.println("");
Serial.println("WiFi connected");
Serial.println("IP address: ");
Serial.println(WiFi.localIP());
server.begin();
}
void loop() {
// listen for incoming clients
WiFiClient client = server.available();
if (client) {
Serial.println("New client");
memset(linebuf,0,sizeof(linebuf));
charcount=0;
// an http request ends with a blank line
boolean currentLineIsBlank = true;
while (client.connected()) {
if (client.available()) {
char c = client.read();
Serial.write(c);
//read char by char HTTP request
linebuf[charcount]=c;
if (charcount");
client.println("");
client.println("ESP32 - Web Server
");
client.println("");
client.println("");
client.println("");
break;
}
if (c == 'n') {
// you're starting a new line
currentLineIsBlank = true;
if (strstr(linebuf,"GET /on1") > 0){
Serial.println("LED 1 ON");
digitalWrite(led1, HIGH);
}
else if (strstr(linebuf,"GET /off1") > 0){
Serial.println("LED 1 OFF");
digitalWrite(led1, LOW);
}
else if (strstr(linebuf,"GET /on2") > 0){
Serial.println("LED 2 ON");
digitalWrite(led2, HIGH);
}
else if (strstr(linebuf,"GET /off2") > 0){
Serial.println("LED 2 OFF");
digitalWrite(led2, LOW);
}
// you're starting a new line
currentLineIsBlank = true;
memset(linebuf,0,sizeof(linebuf));
charcount=0;
} else if (c != 'r') {
// you've gotten a character on the current line
currentLineIsBlank = false;
}
}
}
// give the web browser time to receive the data
delay(1);
// close the connection:
client.stop();
Serial.println("client disconnected");
}
}

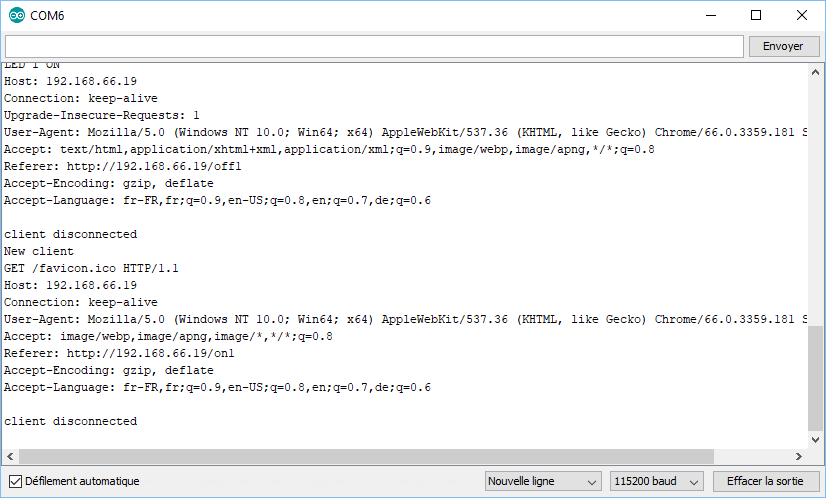
On observe que l'adresse IP du serveur est 192.168.66.19. Si on ouvre un navigateur avec cette adresse, on obtient:

Conclusion
Donc nous avons vu comment installer un serveur web sur un esp32 et comment, via une interface web, agir sur l'ESP 32 en allumant une led. Cela est particuliû´rement intûˋressant, car si on est capable d'allumer une led, on sera capable de commander û distance un relais pour allumer un matûˋriel ûˋlectrique!
© 2026 www.doritique.fr par Robert DORIGNY